Tips & tricks to creating the perfect recording studio
Whether you take it as a career, it’s your side hassle, or you do it for fun, creating a recording studio is one of the best ways you can move your passion forward as a musician or music producer; or an aspiring one, for that matter. But then again, many factors need to be put into consideration when building a recording studio. Of course, you don’t have to construct the studio room on your own, but how you set it up is what matters most.
It will determine how much you can do in the studio, as well as the quality of the music you record. And to be honest, setting up a professional music recording studio can sometimes be financially draining, but it doesn’t mean that you’re completely locked out as a beginner musician whose budget is on the low.
When designing your studio, you’ll want to ensure that the room is created to provide the best functionality, convenience, and quality sound without having to spend an arm and a leg while at it. You want somewhere you can get in and concentrate on just making music without distractions from outside or the fear of having to disturb your neighbours. Before spilling the beans any further, here are some tips and tricks to creating the perfect recording studio on your property or rented facility.
1. Choose a Great Room
The room you choose for your recording studio should be spacious enough to accommodate your recording equipment, your workstation, furniture, and other utilities. If you intend to create one for use by more than one musician, a bigger room would be better. You also never know when you’ll add another set of music recording gear so you’re better off with a bigger room from the word go, of course depending on your budget and what you have available. Also, it is important to consider the quality of flooring as it may affect your sound quality as well as the travelling of sound within the studio.
2.Clear the Room up First
Once you’ve secured one for your studio, proper room preparation will go a long way in making things easier for you and your recording experience better. Before bringing your equipment, furniture, instruments, and other stuff that you intend to have or use in the studio, it’s imperative to clear the room off completely. This will include stripping anything that’s on the walls, clearing off the floor space, and removing anything that vibrates as it could affect the functionality and sound quality.
3. Soundproof Your Studio
To make great music, you need a great environment that is free from interference by external noise. But we live in a busy world where sounds get into our rooms from all sources. Noises from singing birds, hooting cars, annoying neighbours, and even elements such as wind and rain could ruin your work in the recording studio. Also, some studio sessions could get unusually loud and especially if you’re creating a home recording studio, the best way to avoid conflict with your neighbours is to soundproof it.
Soundproofing involves installing dense, heavy material on the walls, as well as gaps in doors and windows to minimize the intensity of sound travelling in or out of the room. Foam panels are specifically great at blocking outside noises while ensuring that any sound produced in the room stays inside. By installing soundproofing material in your studio, you’ll have a better experience in the recording room without having to worry about noise from the street, disturbing your neighbours, or waking them up in the middle of the night. You can make music whenever you feel like it!
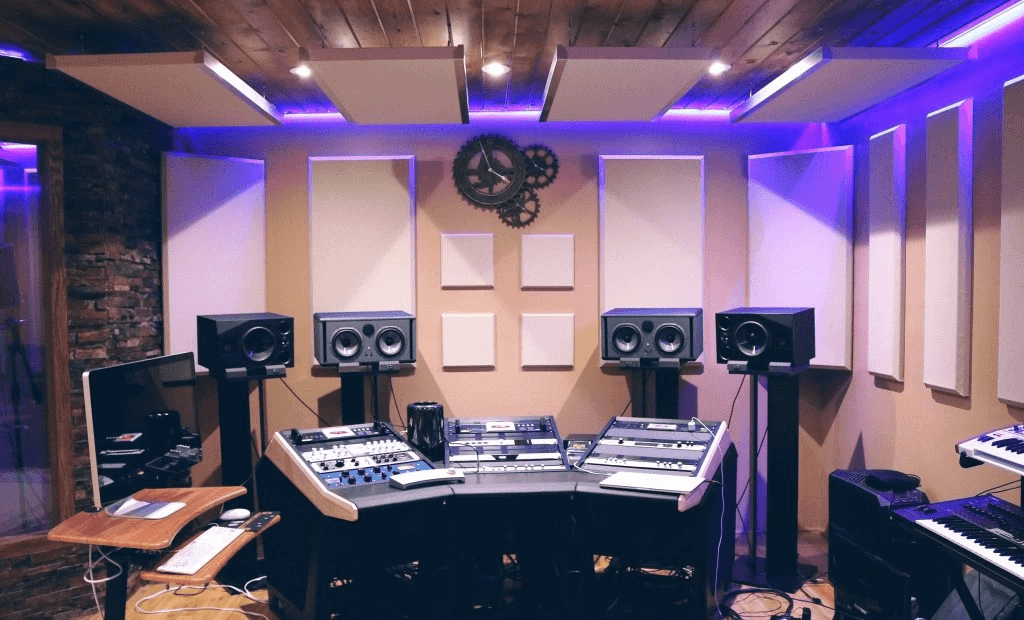
4. Acoustic Treatment Is a Must
While soundproofing will keep your sound indoors and block outside noises, it will do less to improve sound quality in your recording studio. This is because sound travels in a straight line in all directions from the source. When it hits a surface barrier such as a wall, some of it is reflected back depending on the absorbency of the particular surface. In a studio setting, some of these reflections may make their way back into your microphone, thus disrupting the sound quality of your recordings, and this is where acoustic treatment (which is best used alongside soundproofing) comes in.
To improve your studio’s acoustics, there are three important things you’ll need to install; and these include:
Bass Traps – Especially in small home studios, bass traps are forms of acoustic treatments that absorb low frequencies of sound, thus minimizing bass reflections to improve sound quality. Some specialized types known as porous bass traps are also effective in absorbing mid to high frequencies of sound, which makes bass traps the most important acoustic treatments for music recording beginners looking to create a studio.
Acoustic Panels – Once you have bass traps installed, you can then invest in acoustic panels, which are thinner than the former and more effective in absorbing high-frequency reflections. They are often also cheaper and may cover a greater surface area for less money.
Diffusers – Even with acoustic panels and bass traps installed in your studio, you may also need diffusers, which serve to scatter the frequencies that remain. With the right acoustic treatment approach, you can be guaranteed that the sound quality of your recordings will speak for itself. After soundproofing your studio, be sure to install these acoustic absorbers, complement them with acoustic diffusion. It may cost you a considerable amount of money, but you’ll have nothing to regret for years to come.
5. The Recording Station: Your Arrangement Matters
The best setup for your studio will largely depend on the size of the room and the music recording gear you have. However, small recording studios are better off with two workstations; an area for the mixing engineer and a recording area for the singer/s. As for the latter, depending on your needs, you can create a setup for solo recording, dual recording, or a hybrid setup that works for both solo and dual recording. You can also go for the DAW Remote, a simple iPhone app that eliminates the need for multiple stands, allowing singers to record instruments from any position within the room.
Once all the above is in check, just make sure you connect your gear right and invest in great recording equipment that you can afford. After all, making music should be fun and entertaining to you, let alone your target audience.
Discuss your needs with Acoustica Projects!
Acoustica Projects has spent years helping musicians, recording professionals, facilities managers, and home audio enthusiasts solve their sound problems. We’ve learned that the difference between a successful studio acoustic treatment project and an unsuccessful one is often determined by the professionals you choose to work with.
Let’s discuss your needs with our experts!